Supplies: Lineco Acid-Free Binder's Bookboard, Carl DC-220 15" Heavy-Duty Rotary Paper Trimmer, painters tape, shredded tissue paper, matt gel, decorative paper, Tyvek, UHU glue stick, various inks, stamps, washi tape, micro screws, screwdriver, parallel wire cutters, cut 2 jeweler file, acrylic inks, crackle paste, embossing paste, polymer clay embellishments, wooden cradle, awl, waxed nylon thread, pictorial scrapbook paper, Southworth Specialty Parchment Copper Paper, Weldbond glue, Ziploc filled with kitty litter or other weighted items, rust pastes, alcohol inks, bone folder, ink jet prints of images, rubbing alcohol and water in spray bottles, and needle
1. Using
Carl's Cutter cut Bookboard for front and back covers and spine. Tape edge of
cover that touches the spine with painters tape.
2. Use
shredded paper technique to cover front cover attaching with mat gel medium. Use
decorative paper to cover inside cover adhering with UHU glue stick. Use bone
folder to flatten and smooth out any bubbles.
3. Cut Tyvek and color with ink and add stamp
details.

5. Add
washi tape to further secure the Tyvek to the spine. Allow to dry for at least
5 hours.
6. Work
on panels for front and back covers using Crackle Paste Technique and Polymer
Clay Embellishments.
7. Work
on Images you will use in inside covers using Printed Image Upgrade Technique.
8. Use awl to
punch holes into spine where signatures will be attached.
9. Attach panels to front and back covers using
Weldbond glue. Allow to dry flat and use Ziploc plastic bag filled with kitty
litter to press panels onto covers.
10.
To further secure the panels use micro screws
and screwdriver. This also adds a decorative industrial appeal to my work.
12.
Smooth out cut screw tips using a cut 2
jeweler file.
13.
Add some shredded paper and distress inks to
cover up any areas that were rubbed while filing off micro screw tips.
14.
When panels are dried and secured on front
and back covers add images to inside covers using UHU glue stick or Weldbond
glue flattening with bone folder.
15.
Use rust pastes, alcohol inks, and acrylic
paints to add depth and details to covers. Allow to dry fully.
16.
Add closure to front cover, I am using a Tim
Holtz curio knob here, and deerskin lace to back cover securing with a dab of Weldbond.

17.
Choose Pictorial Scrapbook Paper and cut along with Southworth Specialty
Parchment Copper Paper to create signatures for book. Cut to size using Carl's
cutter.
18.
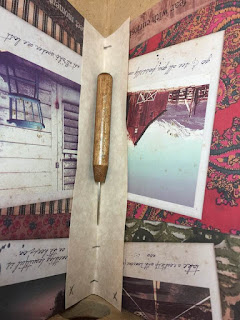
Fold Signatures and place an "X" in
top right corner, this will help with orientation when you are sewing signatures in place.
19.
Make template to punch holes into folded
signatures for book. Use awl and wooden cradle to place holes into each
signature.
20.
Using waxed nylon thread attach signatures to
spine using long stitch technique.
21. Erase "X's" from top right corner of each signatures.
22.
Attach Artist's Signature Sticker inside of
back cover.
24.
Each treasure book is a one-of-a-kind design
never to be repeated and is now ready to be released to the world.


No comments:
Post a Comment