Wednesday, August 22, 2018

Family Reunion-Peek-A-Boo Project

August is the time of family reunions, and if we are honest we all have some real characters in our family trees. Some fun sayings to remember as you all gather together "Our family put the fun in dysfunction", "Every family has that one weird relative, if you don't know who it is, then it's probably you!", "My family is temperamental, Half Temper, Half Mental!", and "In our family we don't hide crazy, we put it on the front porch and give it a cocktail." And truth be told we all have a few skeletons in our closets, this is the inspiration for this project.
Supplies:    Gypsy Soul Laser Cuts-Miniature Bookplates Shape Set, small vintage wooden frame (I used a reclaimed 3 by 4 inches one that had a metallic finish), 
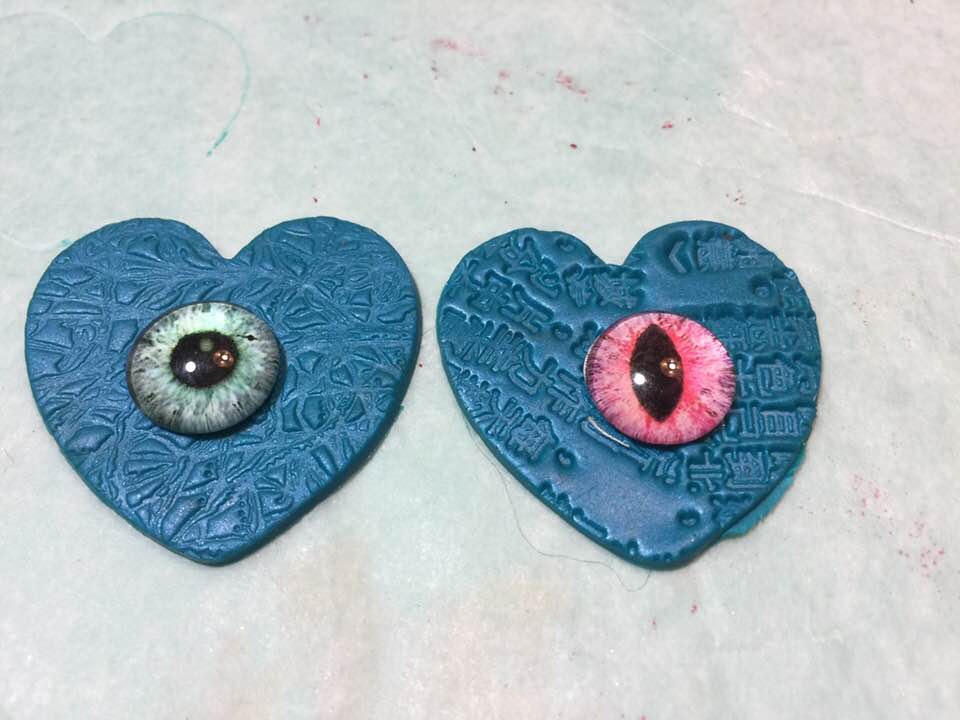
corrugated cardboard, Bookboard, Weldbond, Halloween Lenticular Stickers (They 
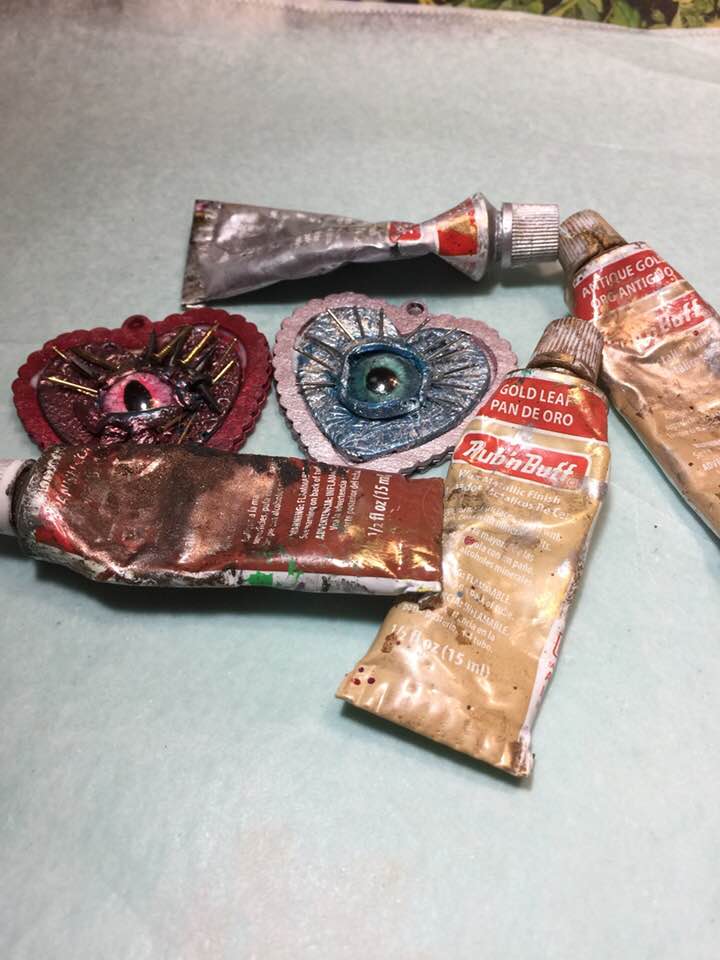
change images depending upon viewing angle), Acrylic Paint-Golden Transparent Red iron Oxide, Golden Yellow Ochre, Deco Art Antiquing Cream Raw Umber, Tim Holtz Distress Oxide-Faded Jeans, Fossilized Amber, Peeled Paint, Vintage Photo, and Walnut Stain, Blending Tool, Spray Bottle with water, StazOn Stone Gray Ink, Versa Mark, Ice Resin German Silver, Tin Holtz Distress Embossing Powder Walnut Stain, Scissors, Heating Tool, Clamps, Small Screws, Screwdriver, Art Alchemy Raven Black Acrylic Paint, Small Paintbrush, Small Skull and Bone Embellishments, Assortment of Seedbeads and Microbeads, Folk Art Moss Painted Finishes, Bark Roll Ribbon, Clear Satin Varnish Medium, Upholstery Tacks, Velvet Ribbon
1.  Take the Gypsy Soul Laser Cuts Miniature Bookplates apart.
2.  Choose three that will work with your Lenticular Halloween Stickers.
 
3.   Separate Corrugated Cardboard showing some of the ribs below.
4.   Measure the section of Corrugated Cardboard that will fit snuggly inside of your frame.
5.  Cut a piece of Bookboard same size as  Corrugated Cardboard and glue the two pieces together using Weldbond.
6.  Make a wash of Acrylic Paint-Golden Transparent Red iron Oxide, Golden Yellow Ochre, Deco Art Antiquing Cream Raw Umber, use a small brush to get into the valleys of the cardboard.
7.  Next, Use Tim Holtz Distress Oxide of Faded Jeans, Fossilized Amber, and Peeled Paint and a blending tool to patina the elevated portions of the cardboard.
8.  Spray with water to oxidize the inks.
9.  Use Tim Holtz Distress Oxide of Vintage Photo and Walnut Stain to darken the ridges of the ribbed cardboard.
10.                To darken the ridges even more apply StazOn Stone Gray Ink.
11.                Spray again with water to oxidize the inks.
12.                Use Versa Mark to apply a coat of Ice Resin German Silver to your chosen GSLC Bookplates.
13.                Cure with heating tool.
14.                Use Versa mark to apply a second coat of Tim Holtz Distress Embossing Powder of Walnut Stain  to the GSLC Bookplates.

15.                Glue cardboard into wooden frame using Weldbond, hold into place with clamps.
16.                Cut and glue Lenticular Halloween Stickers into GSLC Bookplates using Weldbond, hold into place with clamps.
17.                Use small screws and screwdriver to attach GSLC Bookplates "Frames" to cardboard.
18.                Darken small brass screws with Art Alchemy Raven Black Acrylic Paint using a small paintbrush.

19.                Glue Small Skull and Bone Embellishments into each bottom corner using Weldbond.
20.                Allow to fully dry. I always forget this step!!
21.                Use Weldbond to apply Assortment of Seedbeads and Microbeads in random places around your project, allow to dry completely and add more layers if necessary.
22.                Once dry add patina to the beads using Folk Art Painted Moss Finishes using a small paintbrush.
23.                Add a few tiny pieces of bark ribbon to random areas to add even more distress wonderfulness and textures to your project.
24.                Distress once again using Folk Art Painted Moss Finishes.
25.                Because I will be using this for a panel of one of my Hand Bound Tresurebooks  or Houdini-Hideaway boxes I am carefully applying several coats of Dura Clear Satin Varnish to assure stability of seedbeads and microbeads.
26.                If you were giving it as a gift and your frame did not have a way to hang you could use two upholstery tacks to attach a decorative velvet ribbon for hanging.
Some final thoughts on family: “Family gives us two things; one is roots, the other is wings”, “Insanity runs in my family; it practically gallops!” -Cary Grant, “I wish I could relate to the people I’m related to.” -Jeff Foxworthy “My family is my strength and my weakness.” -Aishwarya Rai Bachchan. In the end I know my family would do anything for me and I am the person I am today partially due to my family. I also believe that family is not always those you were born to but those who know all of your deep dark secretes and choose to love you anyhow.


Wednesday, August 8, 2018

Angel or Devil-Peek-A-Boo Project

Over the Rhine is one of my favorite bands. They lyrics to their song "What I'll Remember Most" are "The biggest lies are the little ones. When the look in your eyes is the distant one. Angel or demon You know that they can share the same bed I've laid awake so long I've got them both inside my head. You were 80% angel 10% demon. The rest was hard to explain. This is the inspiration for this current project.


Supplies: (2) Gypsy Soul Laser Cuts-Wings Assortment, Gypsy Souls Laser Cuts-Feathers Shape Set , Gypsy Soul Laser Cuts-Family Tree, (I used the hearts only), 2 small dragon eyes, Lumiere Pain Hi-Lite Blue, Pearl White, Crimson, Deco Art-Festive Red, Paintbrush, Clamps, Weldbond, Polymer Clay, Heart Shape and Circle Cutters, Stamps, Clear Roller, Ribbon Blade, Sculpey Liquid Clay, Tiny Nails, Mica Powders- I used Finnabair White and Brass, Rangers Grey, White and Black Glitter, Deco Art Dura Clear Matte Varnish, paintbrush, Versa Mark Marker, Embossing Powders-I used Judi Kins Extreme Peacock, Opaque White ,Rangers Black Sparkle, Black, Ice Resin-Tarnished Bronze and German Silver, Heating Tool, Exacto Blade, Weldbond, Rub'n Buff-Silver, Antique Gold, Gold Leaf, and Spanish Copper, Glossy Accents, Finnabair Microbeads, Tyvek, Scissors, Bag of BBs or Kitty Litter, Clear(White) and Black Gesso, Assorted Beads, Soft Flex Beading Wire, 2mm Barrel Crimp Bead, Crimping Tool, Miniature Wind Chime Kit, pewter chandelier earring finding, wire, microscrew, screwdriver
1.  Take apart Gypsy Soul Laser Cuts Wings Assortment and two Heart Frames from Family Tree Kit.
2.   Choose one "good" dragon eye-I used a blue human eye- and one "bad" dragon eye-I used a red cat eye.
3.  Paint one heart with Lumiere Hi-Lite Blue and Pearl White, the other with Lumiere Crimson and DecoArt Festive Red.
 4.  Glue Hearts together and clamp into place, allowing to dry fully.
5.  Roll out your polymer clay into a thin sheet.
6.  Cut into two pieces.
7.  Use clear roller and gently roll over two stamps of your choosing.
8.   Use heart cutter to cut out two hearts.
9.  Place eyes in center of each clay heart gluing into place with Sculpey Liquid Clay.
10.                Add details to eyes using circle cutters, small nails securing with Sculpey Liquid Clay.
11.                Use Mica Powders to "paint" the eyes, I used Finnabair White and Silver for "good eye" and Red and Gold for "bad eye". Add small nails for added details.
12.                Bake as per manufactures recommendations.
13.                Paint one side of wings with a paint made of mixing Finnabair white mica powders and white glitter added to DecoArt Dura Clear Matte Varnish.
14.                Paint the side of wings with a paint made of mixing Finnabair black and bronze mica powders and black glitter added to DecoArt Dura Clear Matte Varnish.
15.                Add dimension to wings by variegating lines of embossing powders and ice resin-I used a versa mark marker I added Ice Resin- German Silver, Judi Kins-Opaque White Embossing Powder and Ultimate Peacock to the "good wings" and Ice Resin- Tarnished Bronze, Rangers Embossing Powder of Black and Black Sparkle to the "bad wings"
16.                Be sure to cure with heating gun after each new color added and be extra careful not to contaminate your supplies as you add each additional layer.
17.                Use an Exacto Blade to reopen some of the laser cuts that are now covered with cured embossing powders and ice resins.
18.                Glue cooled clay eyes into Heart Frame using Weldbond.
19.                Distress and add depth to heart eye frames using Rub'n Buff.
20.                Fill in any gaps using Glossy Accents and Microbeads.
21.                Glue wings together using a small strip of Tyvek and Weldbond.
22.                 Allow to dry completely and flat weighted down with BBs or kitty litter.
23.                Trim Tyvek from wings so it does not show through heart eye frames.
24.                Glue each heart eye from on its respective side allowing to dry completely and flat weighted down with BBs or kitty litter.
25.                I wanted to add more stability to the wings and coated them with a clear gesso thinking it would dry clear and transparent. BUT IT DRIED WHITE!! So I had to save my cool project.
26.                I went through my supplies and found another set of Gypsy Souls Laser Cuts-Wings Assortment and Gypsy Souls Laser Cuts-Feathers Shape Set to add more depth to my wings.
27.                I painted wings with white gesso then I used a versa mark marker I added Ice Resin- German Silver, Judi Kins-Opaque White Embossing Powder and Ultimate Peacock to the "good wings"
28.                I painted feathers with black gesso then I used Ice Resin- Tarnished Bronze, Rangers Embossing Powder of Black and Black Sparkle to the "bad feathers"
29.                Glue to respective side using Weldbond.
30.                Allow to dry completely and flat weighted down with BBs or kitty litter.
31.                String together an assortment of beads using SoftFlex and crimping the ends leaving a loop to put a jump ring through.
 
32.                Attach beads to top of heart using a jump ring.
33.                Attach 3 small wind chimes to pewter chandelier earring finding using thin wire.
34.                Attach to the bottom of heart using a micro screw and a screwdriver.  
35.                Mobile is now ready to hang and enjoy for whatever mood you find yourself in.


Some more lyrics from Over the Rhine


I'm a Failed Christian
I don't go to church
I smoke and I drink
And I lie and I curse
(Failed Christian)
All my favorite people are broken
Believe me
My heart should know
Some prayers are better left unspoken
I just wanna hold you
And let the rest go
All my friends are part saint and part sinner
We lean on each other
Try to rise above
We’re not afraid to admit we’re all still beginners
We’re all late bloomers
When it comes to love
All my favorite people are broken
Believe me
My heart should know
Orphaned believers, skeptical dreamers
Step forward
You can stay right here
You don’t have to go
(All My Favorite People)