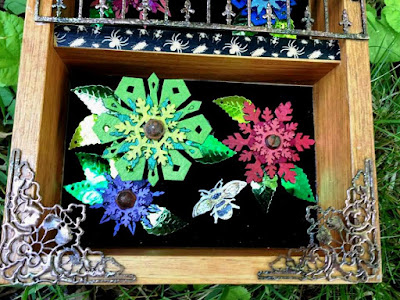
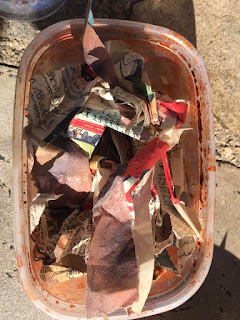
I hate seeing supplies going to waste
and I enjoy a bit of a design challenge. That is the inspiration for my Gothic
Garden Project.
Supplies: Gypsy Soul Laser Cuts-Winter Shape Set, Gypsy Soul Laser Cuts-Snowflake Shape Set, Gypsy Soul Laser Cuts-Dragonflies Fancy, Gypsy Soul Laser Cuts-Creepy Corners 1, Gypsy Soul Laser Cuts-Gothic Border 6 Inch, Gypsy Soul Laser Cuts-Art Deco Border &
Corners, 2 Sections Bamboo Desk
Organizer, Black Velvet Paper, Weldbond,
Bonefolder, Acrylic Paint-Shades of Blue, Red, Green, and Purple, Small
Paintbrush, bag of BBs or kitty litter, Versa Mark, Ice Resin Enamels
Tarnished Bronze and Torched Copper,
Judi Kins Embossing Powders- Opaque White and Perfect Peacock, Rangers Black
Sparkle Embossing Powder, Heating Tool, Green Leaf Sequins, Mini Hardware
Finnabair Mechanicals Metal Embellishments, Glue Stick-I prefer UHU, Washi
Tapes, Nails with Large Flatheads, Hammer, Dura Clear Matte Varnish, DecoArt
Dark Gray Fluid Acrylics,
1.
Separate all snowflake shapes from both Gypsy
Soul Laser Cuts Winter Shape Set and Snowflake Shape Set.
2.
Stack them into
sets of three these will become your flowers.
3.
Measure black
velvet paper carefully to line bottom sections of Bamboo Desk Organizer. This
will become our "frame"
4.
Spend some time
going through your acrylic paints and using spare shapes from GSLC Winter Shape
Set to make your color scheme.
5.
After about an hour
I settled on shades of blue, green, red, purple, and iridescent. They needed to
look complimentary and pop once placed onto the black velvet background.
6.
Map out your garden
using a piece of paper to assure best composition.
7.
Paint your snowflake flowers and place
them aside to dry completely.
8.
Paint two of the
Fancy Dragonflies from Gypsy Soul Laser Cuts collection.
9.
Assemble your
flower once they have dried and allowed to dry again completely and weighted down.
10.
Attach the two GSLC
Fancy Dragonflies together only in the center body portion. Wing should remain
free as we will use it as a design feature when assembling our garden.
11.
Distress the
Mini Hardware using Finnabair Mechanical
Metal Embellishments and Rust Paste Set.
12.
Glue one to each
center of the flowers using Weldbond.
13.
Add Green Sequin
Leaves to each to further the flower illusion.

14.
Allow to dry
completely and weighted down.
15.
Use Versa Mark and Ice
Resin Enamels of Torched Copper and Tarnished Bronze to distress the Gypsy
Soul Laser Cuts Art Deco Corners and Gothic Border-Cure with heating tool.
16.
Use Versa Mark and
Judi Kin Opaque White and Perfect Peacock to emboss the spider web and Rangers
Black Sparkle Embossing Power for the spider of Gypsy Soul Laser Cuts Creepy
Corner Set-Cure with heating tool.
17.
Spider web looked
too crisp so I toned it down with DecoArt Dark Gray Fluid Acrylics.
18.
Add a Washi Tape
Border around the outside of Desk Organizer Frame using glue stick and bone
folder to assure a perfect fit.
19.
Add a bit of the
Washi Tape to the Center Border that separates the two sections.
20.
Reassemble your
garden making not of where you will need to hammer your nails to giving variety
of depth to your flowers.
21.
Carefully remove
items from garden and use a hammer to place nails in correct locations.
22.
Use Weldbond to
carefully glue all items into garden.
23.
Carefully flue GSLC
Art Deco Corners and Gothic Border into their correct places.
24.
Allow to dry
completely and weighted down.
25.
Add GLSC Spider Web
to the top gluing into place with Weldbond allowing to dry completely and
weighted down.
27.
Because the desk
organizer has a lip on the back you can use this to hang your gothic garden or
you can add a small saw and tooth picture hanger if you prefer addition
stability.
Over the Rhine's Wildflower Bouquet is the perfect
song for this project:
If I die in the winter send roses
In the spring, magnolias
If I’m called in the summer or in the fall
Best of all – bring me a wildflower bouquet
In the dirt and clay don’t lay me down
And stare at a cold lonely hole in the ground
When I go to my Maker in smoke and ash
It won’t be your grief I crave
Your tears will not be necessary
Build a blazing fire, drink something merry
When the sparks fly off into the wind
That will be me blowing away
Bury my ashes with the dogs I’ve loved
My faithful companions from God above
And ‘neath a sycamore we’ll grow strong
And the roots will bear us away
If my one true Love should join me there
Mother nature soon will be aware
That sycamore will thrum and sing
And we’ll have left it that way
So I don’t want you to feel sorry
God knows how I despise your pity
And I’ll no longer bear the weight of worry
Those angry robes all fall away


