Showing posts with label Monsters. Show all posts
Wednesday, September 25, 2019
Wednesday, September 11, 2019
Misunderstood Monsters and Mysterious Creatures Alphabet- Last Installment K and X -A Peek-a-Boo Project
It is fitting that on 9/11 my one monster is associated with an iconic New York building and the whole series was to look at others differently. There are real monsters in this world but they are not always what people say they are. I will be
reusing the Small 5" by 7" Wooden IKEA frames I added to patina to
the last time and have included those steps here for reference. This time I
will be using Infusion Coloured Stains and water
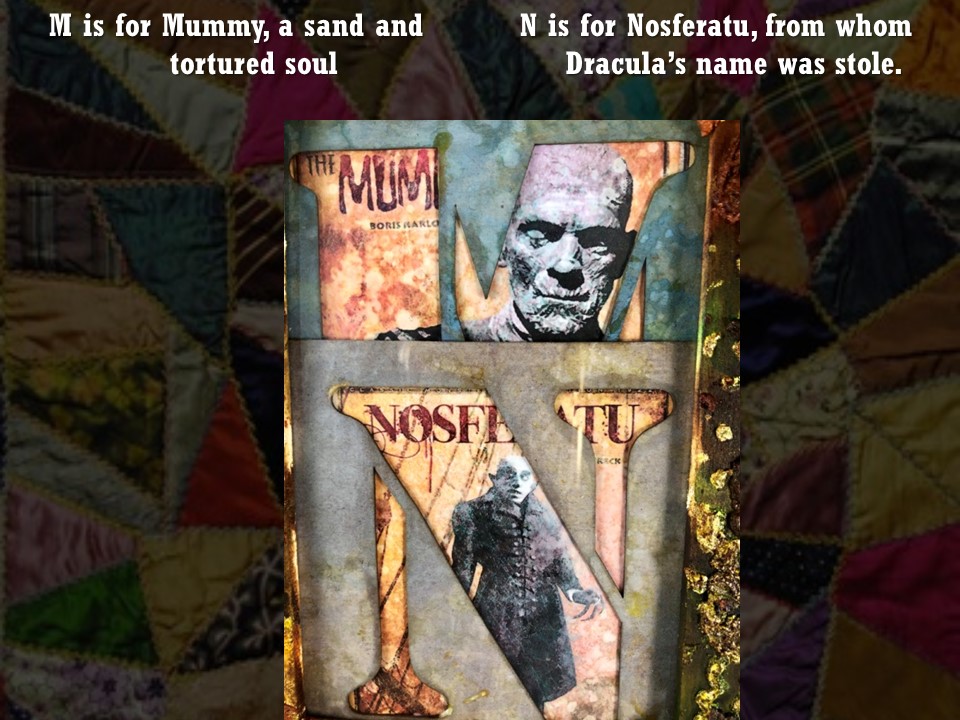
to alter the Gypsy Soul Laser Cuts Alphabet Stencils for "K" is for
King Kong, and "X" is for X-men many marvelous and mysterious
creatures. Remember this technique can be used to alter any of the GSLC
chipboards.
2. Print Images of your choosing to represent each letter, I have decided upon a Monsters and Mysterious Creatures one and not sure what I will find.
3. I am using 3 small 5" by 7" inch IKEA wooden frames to showcase each of the letters.
4. I am a texture type of guy so I want to alter the frames and give them added interest. I want them to look similar but not the same like they are part of a collection.
5. For the first frame I used various Ice Resin Enamels in German Silver and Torched Copper and Embossing Enamels in Aged Hunter and Aged Copper. I layered them and cured with a heating tool. This method can also be used on any of the GSLC chipboards as I will probably use later in my project.
6. I added Tim Holts Distress Sprays in Walnut Stain to add additional patina.
7. The second frame was aged using Finnabair rust pastes in greens, browns, and orange placed on randomly with a paintbrush. I then used transparent burnt sienna ink to fill in any empty spaces. Once again this technique can be used on any of the GSLC chipboard pieces.
8. The final frame was given a patina using Tim Holtz Distress Grit-Paste and Ferro-Copper Paste applied with a thin plastic spatula using a Snake Skin Stencil and further distressing with alcohol inks in browns and greens. Once again this technique can be used on any of the GSLC chipboard pieces.
9. For altering the GSLC Alphabet Stencil Blanks this time I will be Infusion Coloured Stains and a spray bottle of water.
10. I used different colors on both the GSLC Alphabet Stencil "K" and X". You can sprinkle them both on a nonporous surface and spray with water bottle or sprinkle directly onto chipboards and then mist with a water bottle. As they are water based and if they will be exposed to the elements they should be sealed in a matte medium.
11. Find complimentary pieces metal for the backgrounds of you GSLC Alphabet Framed Designs. I used red for the "K", and a copper for the "X".
12. Cut and glue the appropriate images for each of Framed letters, securing with Weldbond.
13. Our GSLC Alphabet Stencils are complete for Letters "K" and "X" and actually for the whole collection.
Some final thoughts.
"K" is for King Kong, the story of a caged animal who just wanted to find love and to roam free.
"X" is for the X-Men, the story of powerful mutants fighting in a world of normals for peace and equality.
Thank you for joining me in the journey of discovery and introspection. I'm proud of my resiliency and completing such a lengthy project. Now like from a scene from one of my favorite shows, Young Sheldon, when MeeMaw and Sheldon complete the game and they look at each other and say "Now What?" and they decide to rush out to Radio Shack to buy new ones to master. I do feel a strange sense of sadness as I say goodbye to my Monster and Mysterious Creatures Alphabet. Maybe I need to arrange them alphabetically and show them in their entirety, but this is a task for another day.
Supplies:
Gypsy Soul
Laser Cuts-Alphabet Stencil Blanks, Gypsy Soul
Laser Cuts-Snowflake Shape Set, Gypsy Soul
Laser Cuts-String Alongs - Gothic, 3 small 5" by 7" inch IKEA wooden
frames, Matte Medium Ice Resins in Torched Copper and German Silver, Aged
Hunter and Aged Copper Embossing Enamel, Tim Holtz Distress Spray Stain in
Walnut, Heating Tool, Finnabair Rust Pastes in Greens, Browns, and Orange,
Transparent Burnt Sienna Ink, Paint Brush, Versa mark Ink Pad, Embossing
Powders-Tarnished Gold, Copper, Wendy Vecchi Red Geranium, PEARLustre Lapis,
and Ranger Black Sparkle, Pieces of scrapbook papers for the backgrounds,
Various Printed Images of Monster and Mysterious Creatures using Inkjet Printer
and paper, and Weldbond.
1. Take GSLC
Alphabet Stencil Blanks from Package.2. Print Images of your choosing to represent each letter, I have decided upon a Monsters and Mysterious Creatures one and not sure what I will find.
3. I am using 3 small 5" by 7" inch IKEA wooden frames to showcase each of the letters.
4. I am a texture type of guy so I want to alter the frames and give them added interest. I want them to look similar but not the same like they are part of a collection.
5. For the first frame I used various Ice Resin Enamels in German Silver and Torched Copper and Embossing Enamels in Aged Hunter and Aged Copper. I layered them and cured with a heating tool. This method can also be used on any of the GSLC chipboards as I will probably use later in my project.
6. I added Tim Holts Distress Sprays in Walnut Stain to add additional patina.
7. The second frame was aged using Finnabair rust pastes in greens, browns, and orange placed on randomly with a paintbrush. I then used transparent burnt sienna ink to fill in any empty spaces. Once again this technique can be used on any of the GSLC chipboard pieces.
8. The final frame was given a patina using Tim Holtz Distress Grit-Paste and Ferro-Copper Paste applied with a thin plastic spatula using a Snake Skin Stencil and further distressing with alcohol inks in browns and greens. Once again this technique can be used on any of the GSLC chipboard pieces.
9. For altering the GSLC Alphabet Stencil Blanks this time I will be Infusion Coloured Stains and a spray bottle of water.
10. I used different colors on both the GSLC Alphabet Stencil "K" and X". You can sprinkle them both on a nonporous surface and spray with water bottle or sprinkle directly onto chipboards and then mist with a water bottle. As they are water based and if they will be exposed to the elements they should be sealed in a matte medium.
11. Find complimentary pieces metal for the backgrounds of you GSLC Alphabet Framed Designs. I used red for the "K", and a copper for the "X".
12. Cut and glue the appropriate images for each of Framed letters, securing with Weldbond.
13. Our GSLC Alphabet Stencils are complete for Letters "K" and "X" and actually for the whole collection.
Some final thoughts.
"K" is for King Kong, the story of a caged animal who just wanted to find love and to roam free.
"X" is for the X-Men, the story of powerful mutants fighting in a world of normals for peace and equality.
Thank you for joining me in the journey of discovery and introspection. I'm proud of my resiliency and completing such a lengthy project. Now like from a scene from one of my favorite shows, Young Sheldon, when MeeMaw and Sheldon complete the game and they look at each other and say "Now What?" and they decide to rush out to Radio Shack to buy new ones to master. I do feel a strange sense of sadness as I say goodbye to my Monster and Mysterious Creatures Alphabet. Maybe I need to arrange them alphabetically and show them in their entirety, but this is a task for another day.
Wednesday, August 14, 2019
Misunderstood Monsters and Mysterious Creatures Alphabet-Installment R, V, and Y-A Peek-a-Boo Project
I will be
reusing the Small 5" by 7" Wooden IKEA frames I added to patina to
the last time and have included those steps here for reference. This time I
will be using Embossing Powders and a Heating tool to alter the Gypsy Soul
Laser Cuts Alphabet Stencils for "R" is for Ravens, messengers of bad
luck, "V" is for Vampires sometimes in the form of a bat, and
"Y" is for Yeti also known as the Abominable Snowman. Remember this
technique can be used to alter any of the GSLC chipboards.
2. Print Images of your choosing to represent each letter, I have decided upon a Monsters and Mysterious Creatures one and not sure what I will find.
3. I am using 3 small 5" by 7" inch IKEA wooden frames to showcase each of the letters.
4. I am a texture type of guy so I want to alter the frames and give them added interest. I want them to look similar but not the same like they are part of a collection.
5. For the first frame I used various Ice Resin Enamels in German Silver and Torched Copper and Embossing Enamels in Aged Hunter and Aged Copper. I layered them and cured with a heating tool. This method can also be used on any of the GSLC chipboards as I will probably use later in my project.
6. I added Tim Holts Distress Sprays in Walnut Stain to add additional patina.
7. The second frame was aged using Finnabair rust pastes in greens, browns, and orange placed on randomly with a paintbrush. I then used transparent burnt sienna ink to fill in any empty spaces. Once again this technique can be used on any of the GSLC chipboard pieces.
8. The final frame was given a patina using Tim Holtz Distress Grit-Paste and Ferro-Copper Paste applied with a thin plastic spatula using a Snake Skin Stencil and further distressing with alcohol inks in browns and greens. Once again this technique can be used on any of the GSLC chipboard pieces.
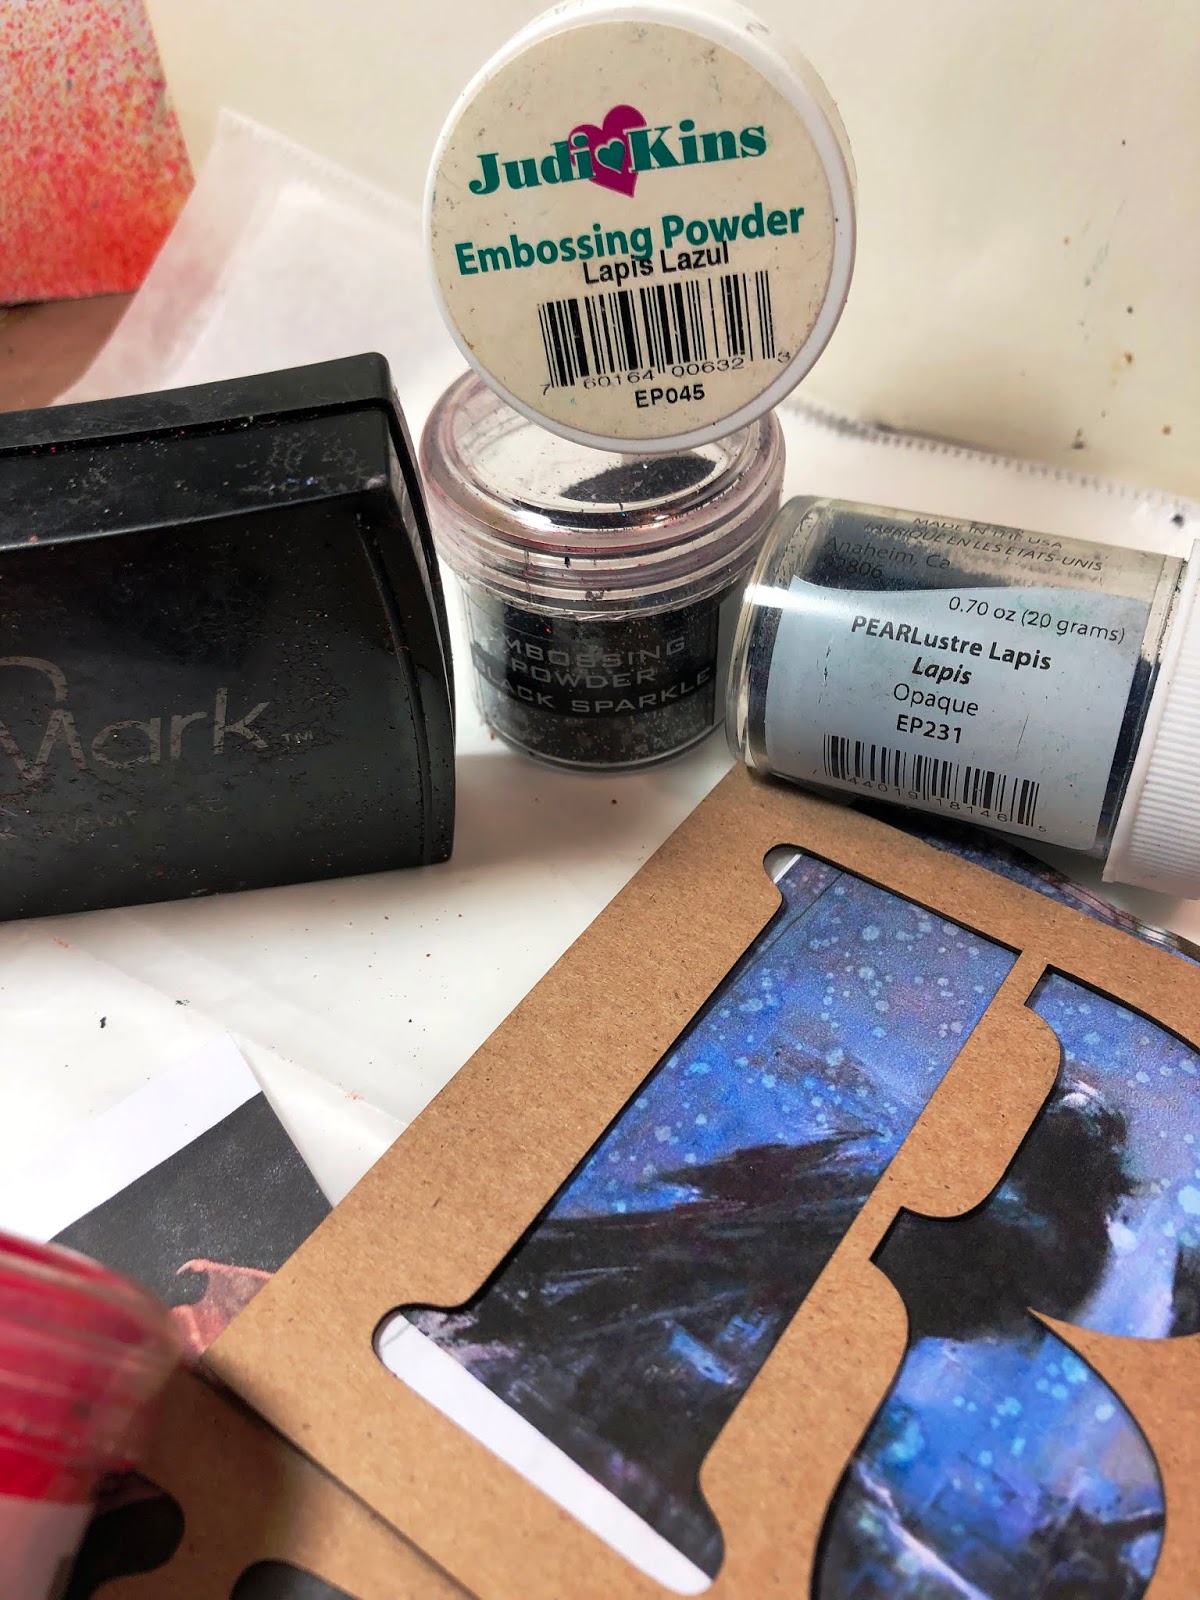
9. For altering the GSLC Alphabet Stencil Blanks this time I will be Versa Mark Ink Pad, Embossing Powders, and a Heating Tool.
10. I used on PEARLustre Lapis, and Ranger Black Sparkle Embossing Powders on the GSLC Alphabet Stencil "R", Wendy Vecchi Red Geranium Embossing Powders on the GSLC Alphabet Stencil "V", and Tarnished Gold and Copper Embossing Powders on the "Y".
11.
Choose the Raven and Chandelier from the Gypsy Soul
Laser Cuts String Alongs Gothic Set and some snowflakes from the GSLC Snowflake
Shape Set.
12. Find complimentary pieces of scrapbook papers for the backgrounds of you GSLC Alphabet Framed Designs. I used a gilded script for the "R", I used a Brick and distressed wall for the "V", and a wood grain for the "Y".
13. Cut and glue the appropriate images for each of Framed letters, securing with Weldbond.
14. Add the chosen Raven, Chandelier, and Snowflakes from each of the Gypsy Soul Laser Cuts Sets to add further depth to your designs. I did not alter these chipboards in any way but used them in their original beauty.
15. Our GSLC Alphabet Stencils are complete for Letters "R","V" and "Y"
Some final thoughts.
"R" is for Ravens sometimes a messenger of death but this too may be a misconception.
"V" is for vampires, sometimes in the form of a bat to hide their original conception.
"Y" is for the Yeti sometimes called the Abominable Snowman who never seems to get a warm reception.
Stay tuned for the next and last instillation of my GSLC Alphabet Stencil Blanks-Monsters and Mysterious Creatures Edition. I wonder what I will use for the final two letter "K" and "X"?
Supplies:
Gypsy Soul
Laser Cuts-Alphabet Stencil Blanks, Gypsy Soul
Laser Cuts-Snowflake Shape Set, Gypsy Soul
Laser Cuts-String Alongs - Gothic, 3 small 5" by 7" inch IKEA wooden
frames, Matte Medium Ice Resins in Torched Copper and German Silver, Aged
Hunter and Aged Copper Embossing Enamel, Tim Holtz Distress Spray Stain in
Walnut, Heating Tool, Finnabair Rust Pastes in Greens, Browns, and Orange,
Transparent Burnt Sienna Ink, Paint Brush, Versa mark Ink Pad, Embossing
Powders-Tarnished Gold, Copper, Wendy Vecchi Red Geranium, PEARLustre Lapis,
and Ranger Black Sparkle, Pieces of scrapbook papers for the backgrounds,
Various Printed Images of Monster and Mysterious Creatures using Inkjet Printer
and paper, and Weldbond.
1. Take GSLC
Alphabet Stencil Blanks from Package.2. Print Images of your choosing to represent each letter, I have decided upon a Monsters and Mysterious Creatures one and not sure what I will find.
3. I am using 3 small 5" by 7" inch IKEA wooden frames to showcase each of the letters.
4. I am a texture type of guy so I want to alter the frames and give them added interest. I want them to look similar but not the same like they are part of a collection.
5. For the first frame I used various Ice Resin Enamels in German Silver and Torched Copper and Embossing Enamels in Aged Hunter and Aged Copper. I layered them and cured with a heating tool. This method can also be used on any of the GSLC chipboards as I will probably use later in my project.
6. I added Tim Holts Distress Sprays in Walnut Stain to add additional patina.
7. The second frame was aged using Finnabair rust pastes in greens, browns, and orange placed on randomly with a paintbrush. I then used transparent burnt sienna ink to fill in any empty spaces. Once again this technique can be used on any of the GSLC chipboard pieces.
8. The final frame was given a patina using Tim Holtz Distress Grit-Paste and Ferro-Copper Paste applied with a thin plastic spatula using a Snake Skin Stencil and further distressing with alcohol inks in browns and greens. Once again this technique can be used on any of the GSLC chipboard pieces.
9. For altering the GSLC Alphabet Stencil Blanks this time I will be Versa Mark Ink Pad, Embossing Powders, and a Heating Tool.
10. I used on PEARLustre Lapis, and Ranger Black Sparkle Embossing Powders on the GSLC Alphabet Stencil "R", Wendy Vecchi Red Geranium Embossing Powders on the GSLC Alphabet Stencil "V", and Tarnished Gold and Copper Embossing Powders on the "Y".
12. Find complimentary pieces of scrapbook papers for the backgrounds of you GSLC Alphabet Framed Designs. I used a gilded script for the "R", I used a Brick and distressed wall for the "V", and a wood grain for the "Y".
13. Cut and glue the appropriate images for each of Framed letters, securing with Weldbond.
14. Add the chosen Raven, Chandelier, and Snowflakes from each of the Gypsy Soul Laser Cuts Sets to add further depth to your designs. I did not alter these chipboards in any way but used them in their original beauty.
15. Our GSLC Alphabet Stencils are complete for Letters "R","V" and "Y"
Some final thoughts.
"R" is for Ravens sometimes a messenger of death but this too may be a misconception.
"V" is for vampires, sometimes in the form of a bat to hide their original conception.
"Y" is for the Yeti sometimes called the Abominable Snowman who never seems to get a warm reception.
Stay tuned for the next and last instillation of my GSLC Alphabet Stencil Blanks-Monsters and Mysterious Creatures Edition. I wonder what I will use for the final two letter "K" and "X"?
Wednesday, July 10, 2019
Misunderstood Monsters and Mysterious Creatures Alphabet-Installment E, Q, and U-A Peek-a-Boo Project
I will be
reusing the Small 5" by 7" Wooden IKEA frames I added to patina to
the last time and have included those steps here for reference. This time I
will be using Ferro Metal Effect Colours it is described as a Texture Paint to alter
the Gypsy Soul Laser Cuts Alphabet Stencils for "E" is for Elves,
"Q" is for the Queen of the Fairies and "U" is for Unicorn.
Remember this technique can be used to alter any of the GSLC chipboards.
2. Print Images of your choosing to represent each letter, I have decided upon a Monsters and Mysterious Creatures one and not sure what I will find. I was inspired by Dave Bell Graphic Artist of Classic Monster Posters and will start with them.
3. I am using 3 small 5" by 7" inch IKEA wooden frames to showcase each of the letters.
4. I am a texture type of guy so I want to alter the frames and give them added interest. I want them to look similar but not the same like they are part of a collection.
5. For the first frame I used various Ice Resin Enamels in German Silver and Torched Copper and Embossing Enamels in Aged Hunter and Aged Copper. I layered them and cured with a heating tool. This method can also be used on any of the GSLC chipboards as I will probably use later in my project.
6. I added Tim Holts Distress Sprays in Walnut Stain to add additional patina.
7. The second frame was aged using Finnabair rust pastes in greens, browns, and orange placed on randomly with a paintbrush. I then used transparent burnt sienna ink to fill in any empty spaces. Once again this technique can be used on any of the GSLC chipboard pieces.
8. The final frame was given a patina using Tim Holtz Distress Grit-Paste and Ferro-Copper Paste applied with a thin plastic spatula using a Snake Skin Stencil and further distressing with alcohol inks in browns and greens. Once again this technique can be used on any of the GSLC chipboard pieces.
9. For altering the GSLC Alphabet Stencil Blanks this time I will be using Ferro Mettle Effect Colour Texture Paints.
10. I used Copper on the GSLC Alphabet Stencil "Q", Greengold and Steel on the GSLC Alphabet Stencil "E", and Copper, Gold and Greengold on the "U" .
11. Choose a Dragon, a Fairy, and a Unicorn from each of the Gypsy Soul Laser Cuts Sets .
12. Find complimentary fabric pieces for the backgrounds of you GSLC Alphabet Framed Designs. I used a mesh fabric for the "E", I used a floral print for the "Q", and a rich scarlet magenta for the "U".
13. Cut and glue the appropriate images for each of Framed letters, securing with Weldbond.
14. Add the chosen Dragon, Fairy, and Unicorn from each of the Gypsy Soul Laser Cuts Sets to add further depth to your designs. I did not alter these chipboards in any way but used them in their original beauty.
15. Our GSLC Alphabet Stencils are complete for Letters "E","Q" and "U"
Some final thoughts.
"E" is for elves, who come in many shapes and sizes, living in kingdoms, found in forest, meadows, and hollowed out trees.
"Q" is for the Queen of Fairies, rules over all and gently advises, carefully keeping watch so none will get stung by bees.
Supplies:
Gypsy Soul
Laser Cuts-Alphabet Stencil Blanks, Gypsy Soul
Laser Cuts-Dragons Shape Set, Gypsy Soul
Laser Cuts-Garden Fairies Medium, Gypsy Soul
Laser Cuts-Unicorns
3 small 5" by 7" inch IKEA wooden frames, Matte Medium Ice
Resins in Torched Copper and German Silver, Aged Hunter and Aged Copper
Embossing Enamel, Tim Holtz Distress Spray Stain in Walnut, Heating Tool,
Finnabair Rust Pastes in Greens, Browns, and Orange, Transparent Burnt Sienna
Ink, Paint Brush, Ferro Metal Effects
Colour Texture Paints in Copper, Gold,
Steel and Greengold, a small plastic spatula, Pieces of fabric for the
backgrounds, Various Printed Images of Monster and Mysterious Creatures using
Inkjet Printer and paper, and Weldbond.
1. Take GSLC
Alphabet Stencil Blanks from Package.2. Print Images of your choosing to represent each letter, I have decided upon a Monsters and Mysterious Creatures one and not sure what I will find. I was inspired by Dave Bell Graphic Artist of Classic Monster Posters and will start with them.
3. I am using 3 small 5" by 7" inch IKEA wooden frames to showcase each of the letters.
4. I am a texture type of guy so I want to alter the frames and give them added interest. I want them to look similar but not the same like they are part of a collection.
5. For the first frame I used various Ice Resin Enamels in German Silver and Torched Copper and Embossing Enamels in Aged Hunter and Aged Copper. I layered them and cured with a heating tool. This method can also be used on any of the GSLC chipboards as I will probably use later in my project.
6. I added Tim Holts Distress Sprays in Walnut Stain to add additional patina.
7. The second frame was aged using Finnabair rust pastes in greens, browns, and orange placed on randomly with a paintbrush. I then used transparent burnt sienna ink to fill in any empty spaces. Once again this technique can be used on any of the GSLC chipboard pieces.
8. The final frame was given a patina using Tim Holtz Distress Grit-Paste and Ferro-Copper Paste applied with a thin plastic spatula using a Snake Skin Stencil and further distressing with alcohol inks in browns and greens. Once again this technique can be used on any of the GSLC chipboard pieces.
9. For altering the GSLC Alphabet Stencil Blanks this time I will be using Ferro Mettle Effect Colour Texture Paints.
10. I used Copper on the GSLC Alphabet Stencil "Q", Greengold and Steel on the GSLC Alphabet Stencil "E", and Copper, Gold and Greengold on the "U" .
11. Choose a Dragon, a Fairy, and a Unicorn from each of the Gypsy Soul Laser Cuts Sets .
12. Find complimentary fabric pieces for the backgrounds of you GSLC Alphabet Framed Designs. I used a mesh fabric for the "E", I used a floral print for the "Q", and a rich scarlet magenta for the "U".
13. Cut and glue the appropriate images for each of Framed letters, securing with Weldbond.
14. Add the chosen Dragon, Fairy, and Unicorn from each of the Gypsy Soul Laser Cuts Sets to add further depth to your designs. I did not alter these chipboards in any way but used them in their original beauty.
15. Our GSLC Alphabet Stencils are complete for Letters "E","Q" and "U"
Some final thoughts.
"E" is for elves, who come in many shapes and sizes, living in kingdoms, found in forest, meadows, and hollowed out trees.
"Q" is for the Queen of Fairies, rules over all and gently advises, carefully keeping watch so none will get stung by bees.
"U"
is for Unicorn, who is sure to be one of my favorite surprises, a
magical creature who sometime teases .
Stay tuned for the next instillation of GSLC Alphabet Stencil Blanks. I cannot wait to
see what new images I discover.
Wednesday, June 12, 2019
Misunderstood Monsters and Mysterious Creatures Alphabet-Installment L, O, and S-A Peek-a-Boo Project
I will be
reusing the Small 5" by 7" Wooden IKEA frames I added to patina to
the last time and have included those steps here for reference. This time I
will be using stencils and Wendy Vecchi Black Embossing Paste and Finnabair
Stone Effect Paste to alter the Gypsy Soul Laser Cuts Alphabet Stencils for
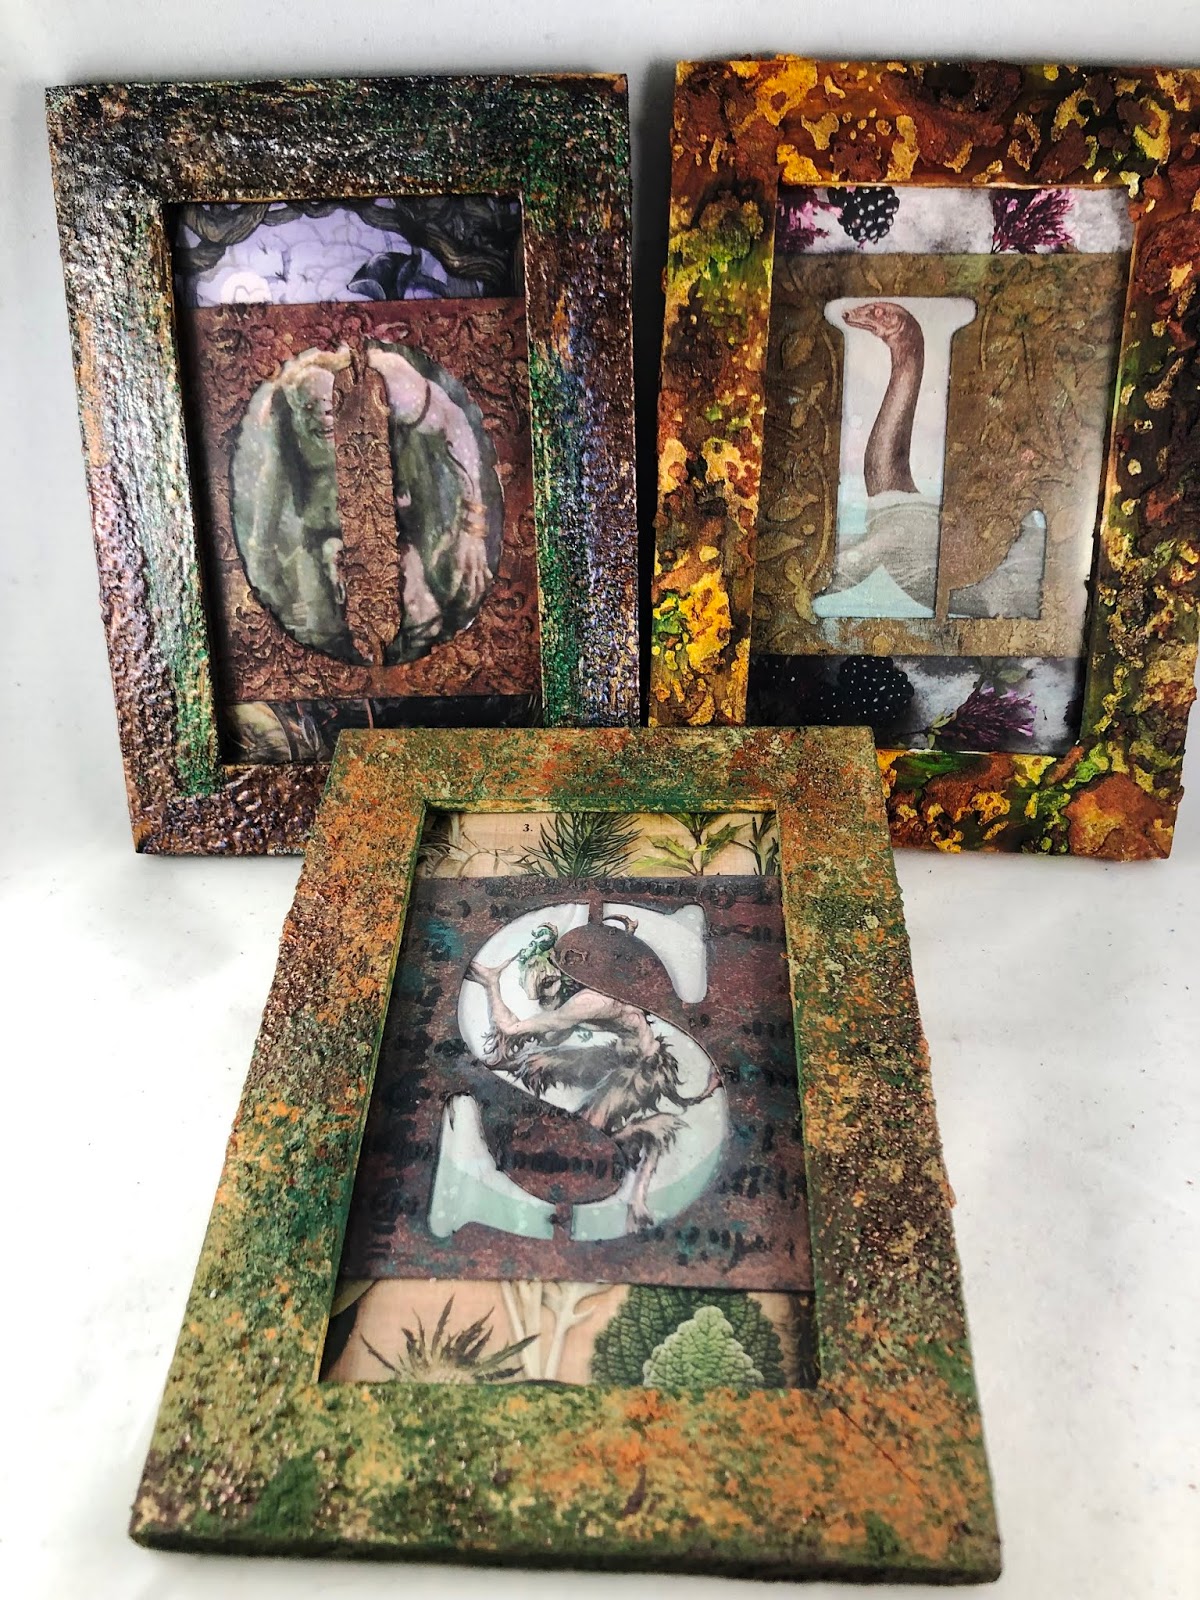
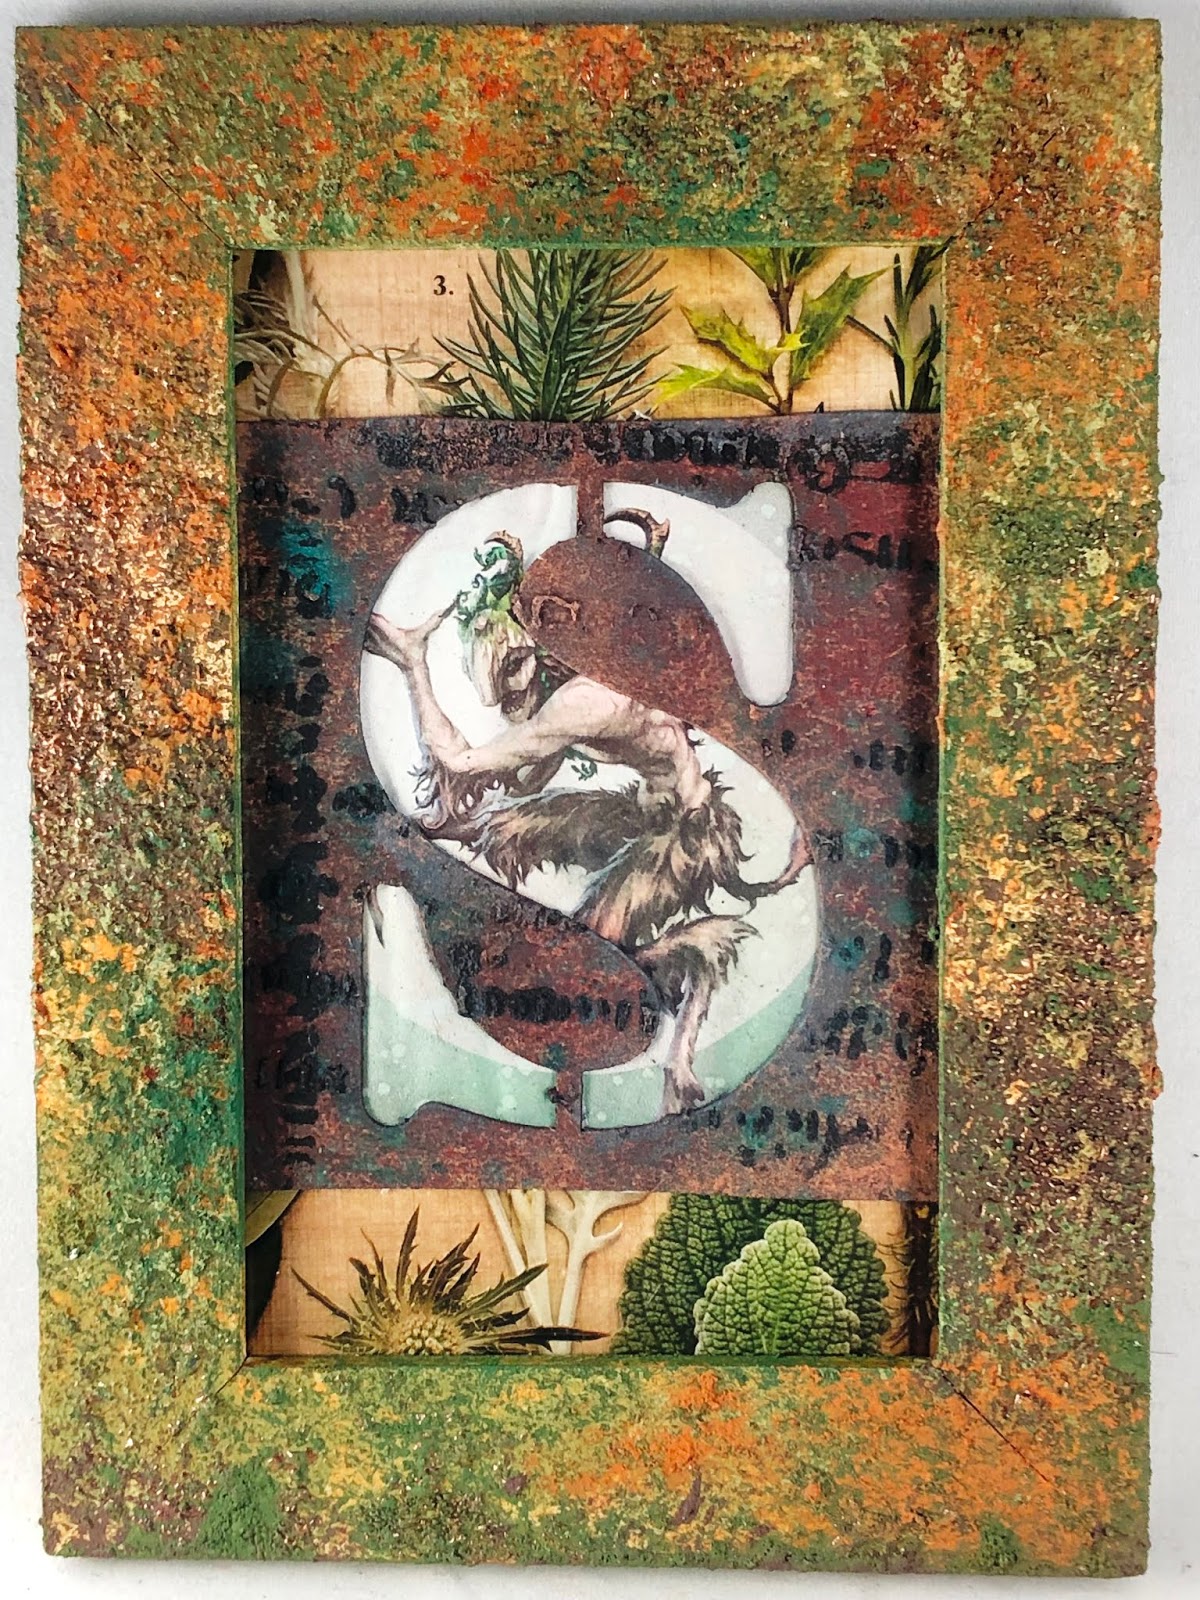
"L" is for the Loch Ness Monster, "O" is for Ogre and
"S" is Satyr. Remember this technique can be used to alter any of the
GSLC chipboards.
Supplies: Gypsy Soul Laser Cuts-Alphabet Stencil Blanks, 3 small 5" by 7" inch IKEA wooden frames, Matte Medium Ice Resins in Torched Copper and German Silver, Aged Hunter and Aged Copper Embossing Enamel, Tim Holtz Distress Spray Stain in Walnut, Heating Tool, Finnabair Rust Pastes in Greens, Browns, and Orange, Transparent Burnt Sienna Ink, Paint Brush, Wendy Vecchi Black Embossing Paste, Finnabair Stone Effect Paste, small plastic spatula, stencils of your choosing, Tim Holtz Distress Sprays and Lindy Metallic Spray of your choosing, Various Run-N-Buff to add patina Pages from magazines for the backgrounds, Various Printed Images of Monster and Mysterious Creatures using Inkjet Printer and paper, and Weldbond.
1. Take GSLC Alphabet Stencil Blanks from Package.
2. Print Images of your choosing to represent each letter, I have decided upon a Monsters and Mysterious Creatures one and not sure what I will find. I was inspired by Dave Bell Graphic Artist of Classic Monster Posters and will start with them.
3. I am using 3 small 5" by 7" inch IKEA wooden frames to showcase each of the letters.
4. I am a texture type of guy so I want to alter the frames and give them added interest. I want them to look similar but not the same like they are part of a collection.
5. For the first frame I used various Ice Resin Enamels in German Silver and Torched Copper and Embossing Enamels in Aged Hunter and Aged Copper. I layered them and cured with a heating tool. This method can also be used on any of the GSLC chipboards as I will probably use later in my project.
6. I added Tim Holts Distress Sprays in Walnut Stain to add additional patina.
7. The second frame was aged using Finnabair rust pastes in greens, browns, and orange placed on randomly with a paintbrush. I then used transparent burnt sienna ink to fill in any empty spaces. Once again this technique can be used on any of the GSLC chipboard pieces.
8. The final frame was given a patina using Tim Holtz Distress Grit-Paste and Ferro-Copper Paste applied with a thin plastic spatula using a Snake Skin Stencil and further distressing with alcohol inks in browns and greens. Once again this technique can be used on any of the GSLC chipboard pieces.
9. For altering the GSLC Alphabet Stencil Blanks this time I will be using stencils and Wendy Vecchi Black Embossing Paste and Finnabair Stone Effect Paste.
10. Choose the stencil and pastes you would like to use for each of the GSLC Alphabet Stencils " L". "O", and "S".
11. Once dry spay with Tim Holtz Distress Stain Sprays and Lindy Metallic Sprays for the first layer.
12. Next add depth and interest using various Rub-N-Buff products.
13. Find complimentary magazine pages for the backgrounds of you GSLC Alphabet Framed Designs. I used blackberries and flowers for the "L", I used a haunted forest for the "O", and A collection of evergreen boughs for the "S".
14. Cut and glue the appropriate images for each of Framed letters, securing with Weldbond.
15. Our GSLC Alphabet Stencils are complete for Letters "L","O" and "S"
Some final thoughts.
"L" is the Loch Ness Monster, the forever elusive "Nessie" hiding in a Scottish Lake.
"O" is for Ogre, large and misunderstood, accused of all the children he did not take.
"S" is for Satyr, half man half beast, some may even find him a sexy beefcake.
Stay tuned for the next instillation of GSLC Alphabet Stencil Blanks. I cannot wait to see what new images I discover.
Supplies: Gypsy Soul Laser Cuts-Alphabet Stencil Blanks, 3 small 5" by 7" inch IKEA wooden frames, Matte Medium Ice Resins in Torched Copper and German Silver, Aged Hunter and Aged Copper Embossing Enamel, Tim Holtz Distress Spray Stain in Walnut, Heating Tool, Finnabair Rust Pastes in Greens, Browns, and Orange, Transparent Burnt Sienna Ink, Paint Brush, Wendy Vecchi Black Embossing Paste, Finnabair Stone Effect Paste, small plastic spatula, stencils of your choosing, Tim Holtz Distress Sprays and Lindy Metallic Spray of your choosing, Various Run-N-Buff to add patina Pages from magazines for the backgrounds, Various Printed Images of Monster and Mysterious Creatures using Inkjet Printer and paper, and Weldbond.
1. Take GSLC Alphabet Stencil Blanks from Package.
2. Print Images of your choosing to represent each letter, I have decided upon a Monsters and Mysterious Creatures one and not sure what I will find. I was inspired by Dave Bell Graphic Artist of Classic Monster Posters and will start with them.
3. I am using 3 small 5" by 7" inch IKEA wooden frames to showcase each of the letters.
4. I am a texture type of guy so I want to alter the frames and give them added interest. I want them to look similar but not the same like they are part of a collection.
5. For the first frame I used various Ice Resin Enamels in German Silver and Torched Copper and Embossing Enamels in Aged Hunter and Aged Copper. I layered them and cured with a heating tool. This method can also be used on any of the GSLC chipboards as I will probably use later in my project.
6. I added Tim Holts Distress Sprays in Walnut Stain to add additional patina.
7. The second frame was aged using Finnabair rust pastes in greens, browns, and orange placed on randomly with a paintbrush. I then used transparent burnt sienna ink to fill in any empty spaces. Once again this technique can be used on any of the GSLC chipboard pieces.
8. The final frame was given a patina using Tim Holtz Distress Grit-Paste and Ferro-Copper Paste applied with a thin plastic spatula using a Snake Skin Stencil and further distressing with alcohol inks in browns and greens. Once again this technique can be used on any of the GSLC chipboard pieces.
9. For altering the GSLC Alphabet Stencil Blanks this time I will be using stencils and Wendy Vecchi Black Embossing Paste and Finnabair Stone Effect Paste.
10. Choose the stencil and pastes you would like to use for each of the GSLC Alphabet Stencils " L". "O", and "S".
11. Once dry spay with Tim Holtz Distress Stain Sprays and Lindy Metallic Sprays for the first layer.
12. Next add depth and interest using various Rub-N-Buff products.
13. Find complimentary magazine pages for the backgrounds of you GSLC Alphabet Framed Designs. I used blackberries and flowers for the "L", I used a haunted forest for the "O", and A collection of evergreen boughs for the "S".
14. Cut and glue the appropriate images for each of Framed letters, securing with Weldbond.
15. Our GSLC Alphabet Stencils are complete for Letters "L","O" and "S"
Some final thoughts.
"L" is the Loch Ness Monster, the forever elusive "Nessie" hiding in a Scottish Lake.
"O" is for Ogre, large and misunderstood, accused of all the children he did not take.
"S" is for Satyr, half man half beast, some may even find him a sexy beefcake.
Stay tuned for the next instillation of GSLC Alphabet Stencil Blanks. I cannot wait to see what new images I discover.
Subscribe to:
Posts (Atom)