Misunderstood Monsters and Mysterious Creatures Alphabet-Installment L, O, and S-A Peek-a-Boo Project
I will be
reusing the Small 5" by 7" Wooden IKEA frames I added to patina to
the last time and have included those steps here for reference. This time I
will be using stencils and Wendy Vecchi Black Embossing Paste and Finnabair
Stone Effect Paste to alter the Gypsy Soul Laser Cuts Alphabet Stencils for
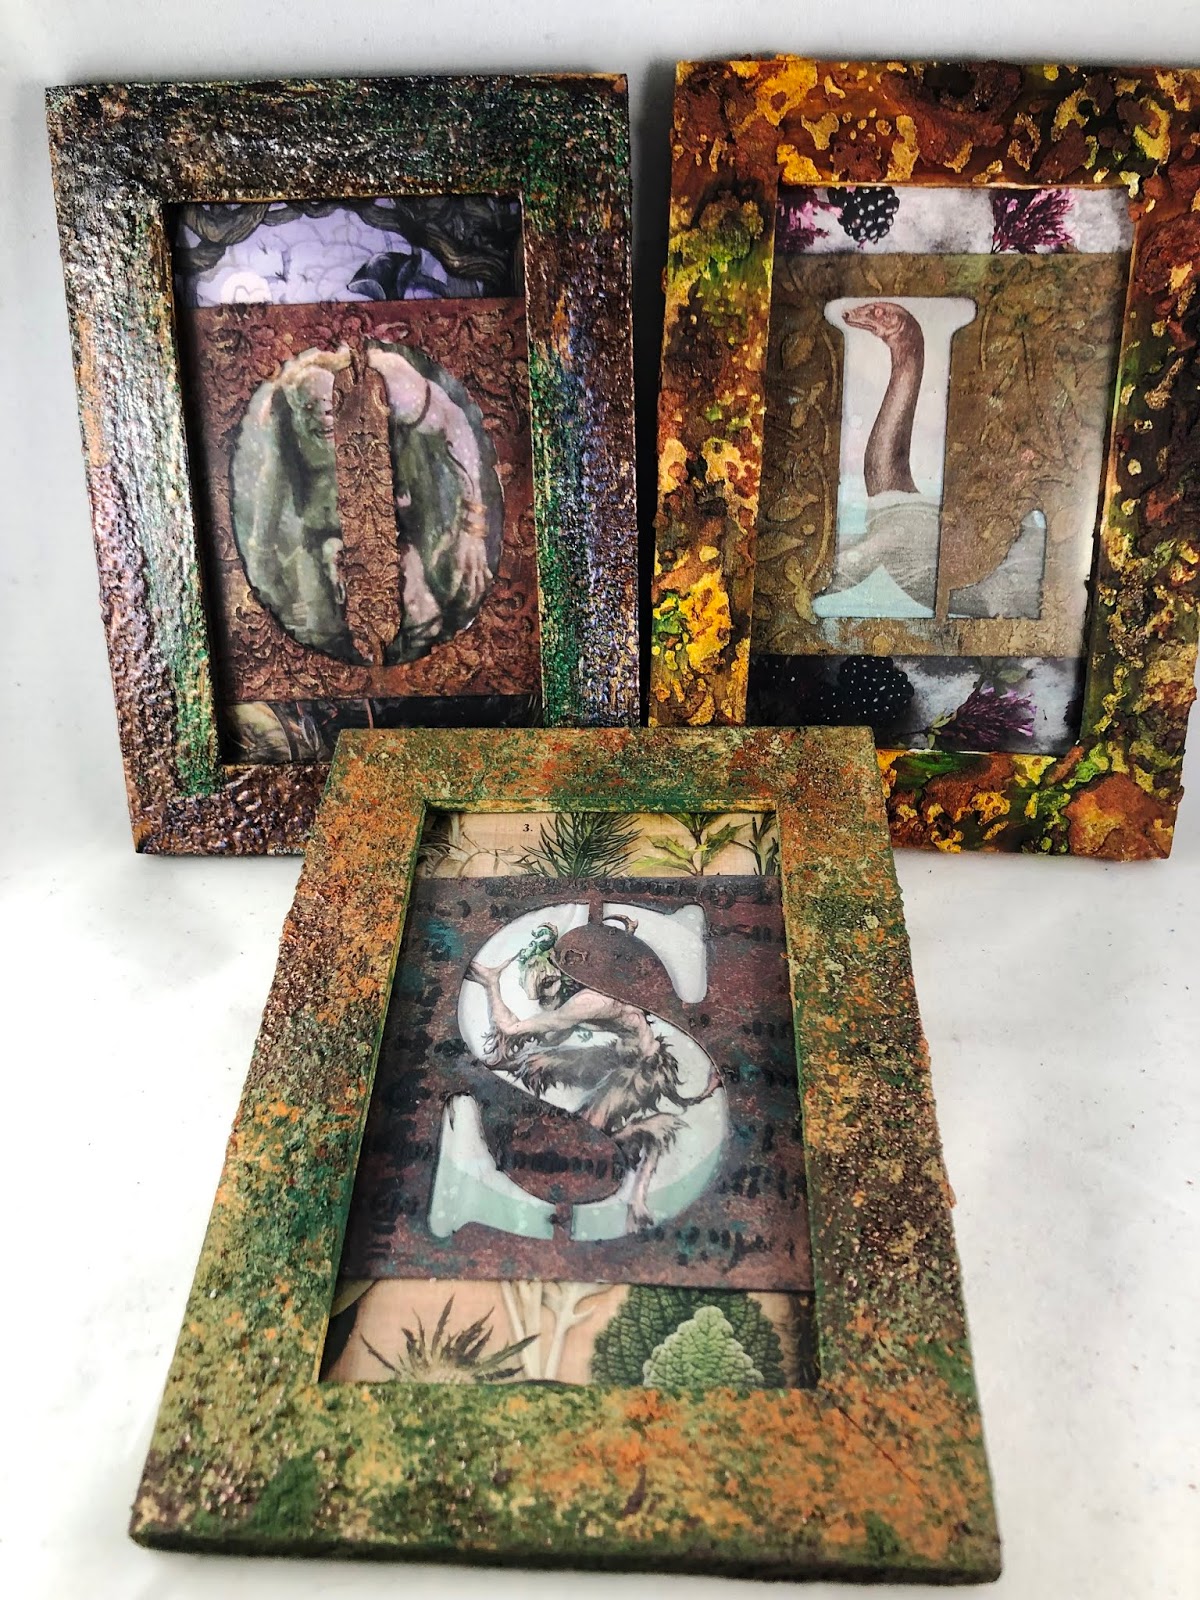
"L" is for the Loch Ness Monster, "O" is for Ogre and
"S" is Satyr. Remember this technique can be used to alter any of the
GSLC chipboards.
Supplies:
Gypsy Soul
Laser Cuts-Alphabet Stencil Blanks, 3 small 5" by
7" inch IKEA wooden frames, Matte Medium Ice Resins in Torched Copper and
German Silver, Aged Hunter and Aged Copper Embossing Enamel, Tim Holtz Distress
Spray Stain in Walnut, Heating Tool, Finnabair Rust Pastes in Greens, Browns,
and Orange, Transparent Burnt Sienna Ink, Paint Brush, Wendy Vecchi Black
Embossing Paste, Finnabair Stone Effect Paste, small plastic spatula, stencils
of your choosing, Tim Holtz Distress Sprays and Lindy Metallic Spray of your
choosing, Various Run-N-Buff to add patina
Pages from magazines for the backgrounds, Various Printed Images of
Monster and Mysterious Creatures using Inkjet Printer and paper, and Weldbond.
1. Take GSLC
Alphabet Stencil Blanks from Package.
2. Print
Images of your choosing to represent each letter, I have decided upon a
Monsters and Mysterious Creatures one and not sure what I will find. I was
inspired by Dave Bell Graphic Artist of Classic Monster Posters and will start
with them.
3. I am using
3 small 5" by 7" inch IKEA wooden frames to showcase each of the
letters.
4. I am a
texture type of guy so I want to alter the frames and give them added interest.
I want them to look similar but not the same like they are part of a
collection.
5. For the
first frame I used various Ice Resin Enamels in German Silver and Torched
Copper and Embossing Enamels in Aged Hunter and Aged Copper. I layered them and
cured with a heating tool. This method can also be used on any of the GSLC
chipboards as I will probably use later in my project.
6. I added Tim
Holts Distress Sprays in Walnut Stain to add additional patina.
7. The second
frame was aged using Finnabair rust pastes in greens, browns, and orange placed
on randomly with a paintbrush. I then used transparent burnt sienna ink to fill
in any empty spaces. Once again this technique can be used on any of the GSLC
chipboard pieces.
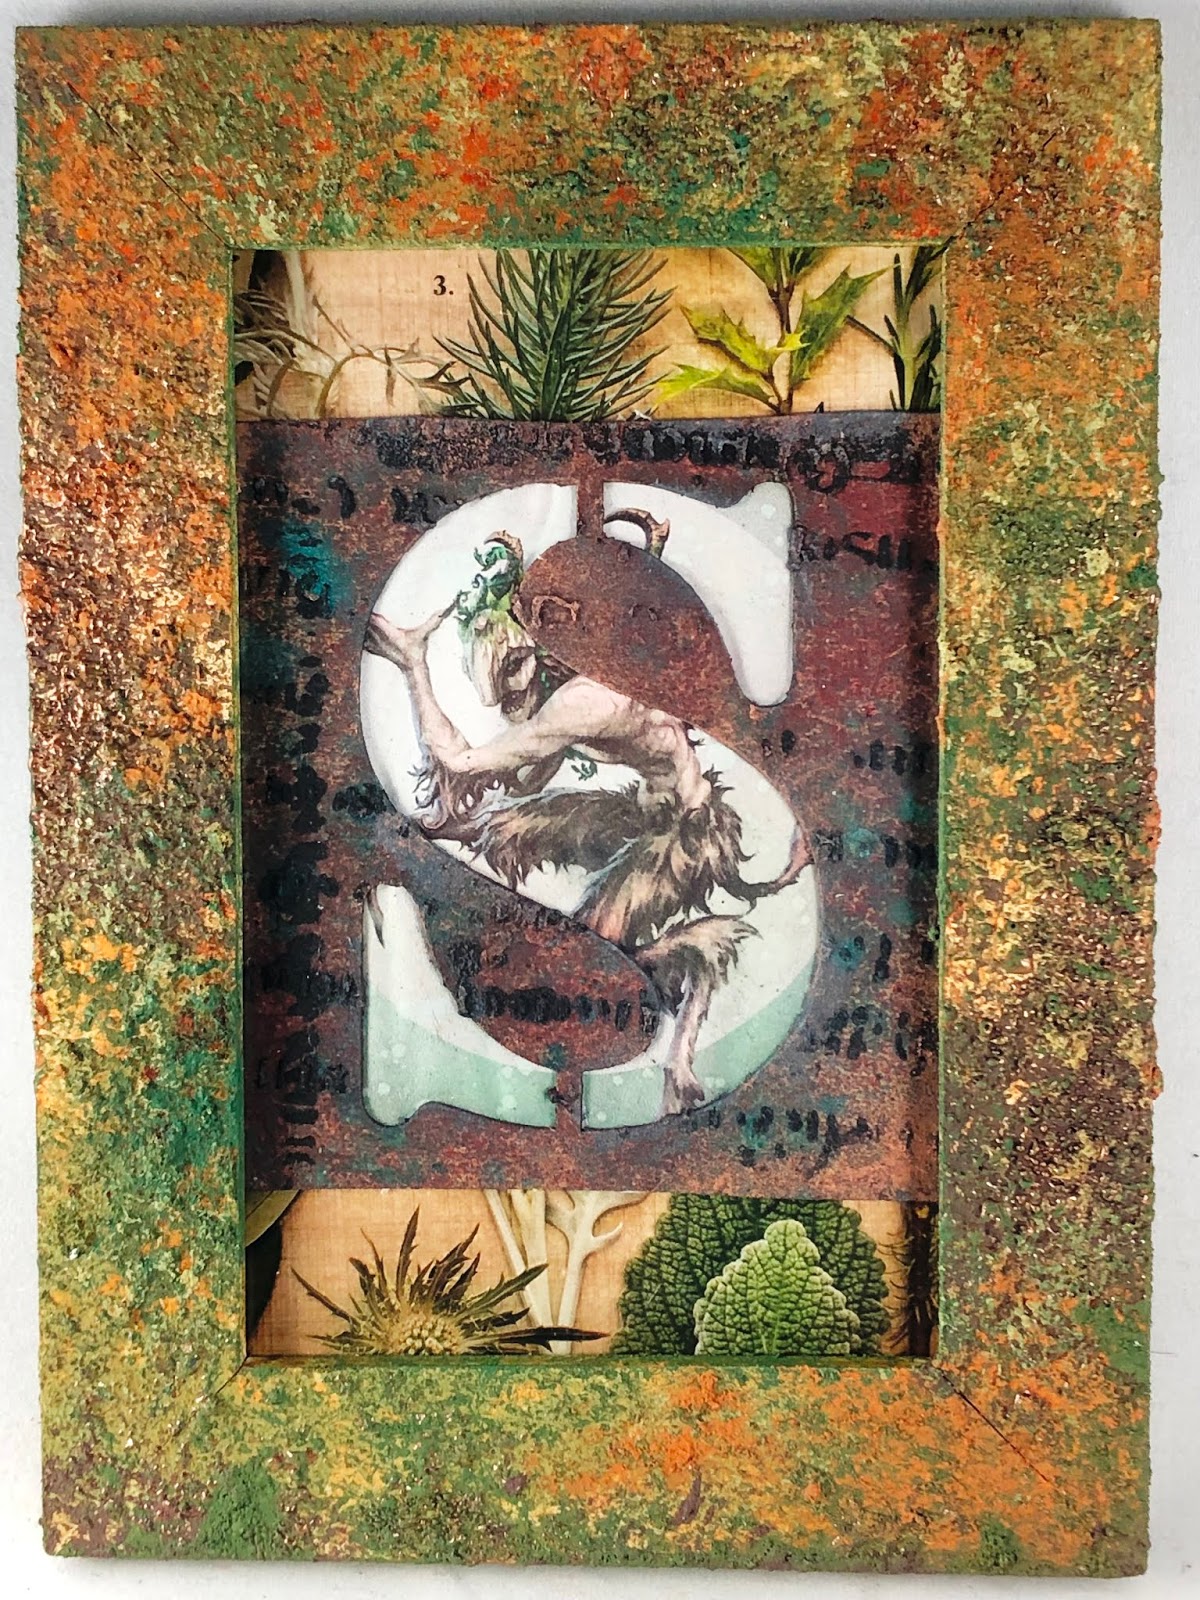
8. The final
frame was given a patina using Tim Holtz Distress Grit-Paste and Ferro-Copper
Paste applied with a thin plastic spatula using a Snake Skin Stencil and further distressing
with alcohol inks in browns and greens. Once again this technique can be used
on any of the GSLC chipboard pieces.
9. For altering
the GSLC Alphabet Stencil Blanks this time I will be using stencils and Wendy Vecchi Black
Embossing Paste and Finnabair Stone Effect Paste.
10.
Choose the stencil and pastes you would like to use
for each of the GSLC Alphabet Stencils
" L". "O", and "S".
11.
Once dry spay with Tim Holtz Distress Stain Sprays
and Lindy Metallic Sprays for the first layer.
12.
Next add depth and interest using various Rub-N-Buff
products.
13.
Find complimentary magazine pages for the
backgrounds of you GSLC Alphabet Framed Designs. I used blackberries and
flowers for the "L", I used a
haunted forest for the "O", and A collection of evergreen boughs for
the "S".
14.
Cut and glue the appropriate images for each of
Framed letters, securing with Weldbond.
15.
Our GSLC Alphabet Stencils are complete for Letters
"L","O" and "S"
Some final thoughts.
"L" is the Loch Ness Monster, the
forever elusive "Nessie" hiding in a Scottish Lake.
"O" is for Ogre, large and
misunderstood, accused of all the children he did not take.
"S"
is for Satyr, half man half beast, some may even find him a sexy
beefcake.
Stay tuned for the next instillation of GSLC Alphabet Stencil Blanks. I cannot wait to
see what new images I discover.


No comments:
Post a Comment