Showing posts with label Fairies. Show all posts

Wednesday, May 10, 2023

Fairies in the Flowers: A Peek-a-Boo Project

I am missing the old homestead this time of year, as another Mother’s Day approaches without my sweet momma being with us. Her flower gardens were magical, we had a lilac hedge between the lower lawn and the newly plowed garden. A pathway between the row of lilacs, keep the tulips and the lupins in the designated area. Ancient Old Fashioned yellow roses next to these, with three lavender colored petals Ohio Spiderworts at their base, a remembrance of my grandparents time spent in that state. A narrow bed of Siberian  Irises between, the front yard, driveway and garden had a clump of orange poppies and painted tinted daisies. Gladiolus were planted in rows of the bountiful garden with its bread and butter corn, zucaanni and yellow squash, red beets, string bean, potatoes, kohlrabi and sometimes lama beans and peas. The lower end of the garden had a row of pink, red, and white peonies we were told that ants were needed to help them bloom as their bud were so compacted. The last flower bed at this side of the garden was one of my favorites, as it held the Bearded Iris Collection. 

There is another flower garden that was hidden in the side yard, beyond the black walnut trees, and hickory nut tree, along the old road in the shadow of the woodshed. This was the wildflower garden, perhaps the most magical of all, almost as if fairies could be found frolicking there. These are the inspirations for this artwork.


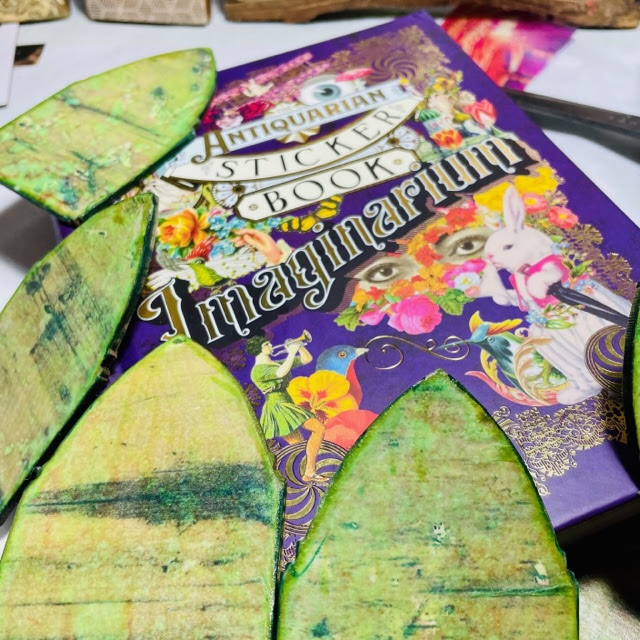
Supplies:  GSLC Arch Top Houe Silhouettes, Antiquarian Sticker Book: Imaginarium, Printed Woodgrain, Pencil, UHU GlueStick, Sanding Block, Green Markers, DecoArt Matte Gel Medium, Paintbrush, 49 Market Rub Ons, Fern Vine Paper Punch, Old Calendar Pictures, Ranger Glossy Accents Dimensional Medium, Small Plastic Palette Knife, Blending Tool, Brown Archival Inks


  1. Gather Supplies.
  2. Print Wood Grain on Ink Jet Printer.
  3. Spritz with Water Allowing to Patina the Print.
  4. Once Fully Dry Trace using  GSLC Arch Top House Silhouettes  With Pencil  and Cut Out.
  5. Use a UHU GlueStick to Apply Cut Outs to GSLC Arch Top House Silhouettes.
  6. Once Fully Dry Use a Sanding Block to Tidy Up the Edges.
  7. Darken the Edges of GSLC Arch Top House Silhouettes with Green Markers.
  8. Seal it all in with DecoArt Matte Gel Medium and a Paintbrush.
  9. Collect Images from Antiquarian Sticker Book: Imaginarium. I Found Lovely Flower Fairies and Glued Them as Focal Points in Center of GSLC Arch Top House Silhouettes.
  10. Next Add 49 Market Rub Ons of Stamps , Butterflies and Flowers, Creating a Collage Effect.
  11. Use Fern Vine Paper Punch and Old Calendar Pictures to Add to the Collages.
  12. Once Layered and Satisfied With The Content, use a Ranger Glossy Accents Dimensional Medium and a Small Plastic Palette Knife to Unify the Completed Collages.
  13. Darken the Edges with a Blending Tool and Brown Archival Inks.

Final Thoughts

I was fascinated by the Cottingley Fairies Story. Two young cousins, in 1917 convinced their neighbors and eventually the larger world that there were fairies at the bottom of their gardens. Cottingley Beck still flows in English Countryside. They eventually photographed them and presented them to their family and to the Theosophical Society. Eve. Decade laters it would eventually confirmed they were fakes, cut-out figures, copied from “Princess Mary’s Gift Book” published in 1914. Finally in 1983 one of the young girls now much older, confessed to the hoax.

My momma’s wildflower garden was a collection of ones we gathered in the hollows and woodlands near our family homestead. The mosses almost glow with their intense greenery. It is too early for the mysterious India Pipes to appear with their milky translucent stems and solitary nodding flower.  Soon the flowerbed will carpeted with the dainty purple violets, the strange jack-in-the-pulpits, the brown-mottled tiger lilies, the elusive pink lady slippers, the comical Dutchman breeches, the attractive dainty white and pink striped spring beauties, called "piss in the beds" by his normally regal mother. There will be odd red and white trilliums, named "Nose Bleeds" by his inquisitive mother. Spring is truly the time when the world wakes up with an ever-changing landscape.  


Wednesday, August 11, 2021

An American Original-A Peek-a-Boo Project

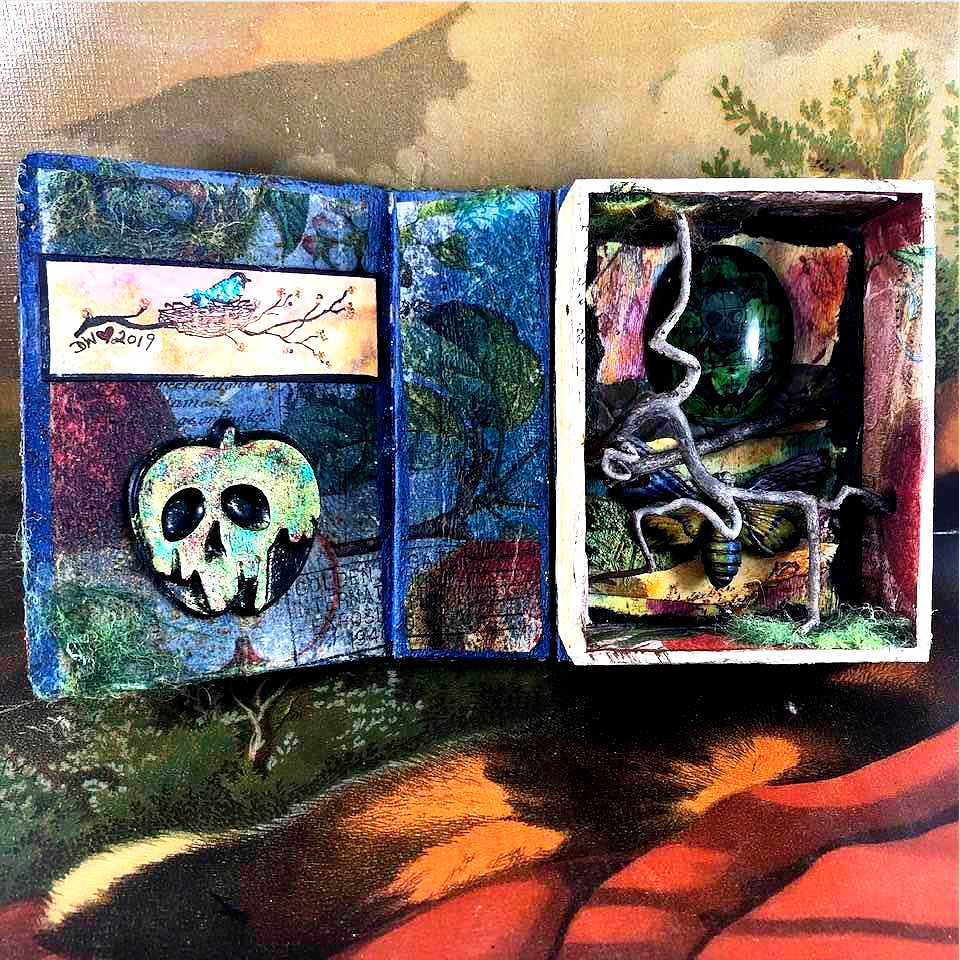
 Snow White is the original Disney Princess, I've always loved watching the video and found delight in the magical world that Walt Disney created. The woodland creatures and the famous poison apple are the inspiration for this artwork

Supplies:  Gypsy Soul Laser Cuts-ATC Sized Faux Book Box, Book Tape or Medical Cloth Tape, Painters Tape, Weldbond, Copper Metallic Acrylic Paint, White Gesso, Paintbrush, Brown Acrylic Paint, Cosmic Shimmer Lava Paste, Blue Acrylic Paints, Matte Gel Medium, Decorative Napkins, Collected Embellishments, Bits of Branches, Heavy Gel Matte, Felting Materials

1.  Collect Materials

2.  Use Painter Tape to Hold Gypsy Soul Laser Cuts ATC Sized Faux Book Box together.

3.  Use Book Tape or Medical Cloth Tape on Inside Box, Paint Outside With White Gesso. This Will Become the "Pages" of "Book".

4.  Paint Inside of with Copper Metallic Paint

5.  Use Book Tape or Medical Cloth Tape on Spine.

6.  Add Blue Acrylic Paint to Cosmic Shimmer Lave Paste, Spread on Inside of "Book Cover", Cure with Heat Tool.


7.  Add Assortment of Brown Acrylic Paint to Cosmic Shimmer Lave Paste, Spread on Outside of "Book Cover", Cure with Heat Tool.


8.  Seal Everything With Matte Gel Medium.

9.   Use Decorative Napkins to Add Layers of Front of "Book Cover".

10.                Assemble Book Box, Gluing with Weldbond.

11.                Select Collected Embellishments, I chose a Resin Poison Apple, A Wooden Panel Assemblage, A Polymer Clay Motif, Bits of Branches, and A Tiny Art Card.

12.                Use Heavy Matte Gel to Adhere Your Chosen Treasures.

13.                Add Bits of Mossy Texture Using Felting Materials.

Some Final Thoughts.

One of the main lessons of Snow White teaches is the danger of vanity. The Evil Queen Wants Snow White dead because she cannot image there is someone more beautiful than her. It is this vanity in the end that destroys her. The concept of real beauty is often found in lowly places and humble creatures.

"Mirror, Mirror on the Wall Who is the Fairest One of All?"

"Oh, Queen, Thou Art Fairest of All I can See, But Over the Hills, Where the Seven Dwarfs Dwell, Snow White is Still Alive and Well, and None is so Fair as She"

"Are You Afraid of Poison? said the Old Woman, Look, I Will Cut the Apple in Two Pieces, You Eat the Red Cheek, and I Will Eat the White."

Snow White Quotes:

"Come on, Perk Up, Won't You Smile For me?"

"I'm Sure I'll Get Along Somehow. Everything's Going to Be Alright."

"There's No Use Grumbling, When the Raindrops Come Tumbling."

"What do you do when Things go Wrong? Oh! You Sing a Song."

"Just Whistle While You Work, And Cheerfully Together We can Tidy Up the Place. So Hum a Merry Tune, It Won't Take Long when There is a Song To Help You Set The Pace.'

The Evil Queen Quotes

"Thirst? Have a Drink."

"Don't Let the Wish Grow Cold."

Dwarf Quotes

"Heigh-ho! Heigh-ho!

It's Off to Work We Go"

"Heigh-ho! Heigh-ho!

It's Home from Work We Go"


Wednesday, November 25, 2020

Falltime Faeries-A Peek-a-Boo-Project

Toadstool and Mushrooms have a litany of symbolic meaning, they are thought to be signs of faeries, gnomes, and other wee folk. They are associated with the moon and in the language of flowers mean suspicion. In literature, they are a symbol of immortality and eccentricity. In China they symbolize life, happiness and rebirth. These are the inspiration for this instillation.
 
Supplies:  GSLC-Art Nouveau Frame 1GSLC-Art Nouveau-Frame 2,GSLC-Art Nouveau Frame 4,GSLC-Garden Fairies Small, Images of Magical Mushrooms, Elongated Wooden Frame, Deli Wrap, Seth Apter Izink Dye Sprays in Tea, Spring Green, and Honey, TH Distress Spray Stain Carved Pumpkin, Hairspray, Nutmeg, Chili Powder, Matte Medium, Paintbrush, Golden Green Gold Acrylic Paint, Weldbond, Weighted Ziploc Bag, Embossing Ink with Roller Applicator, Allure Ammo Camo, Weather Wood, and Mercury Rising Embossing Powders, Heating Tool, TH Distress Stain Bundled Sage, Golden Van Dyke Brown Hue,
1.  Gypsy Soul Laser Cuts have four of these Art Nouveau Frames, I chose 1, 2, and 4 for this artwork.
2.  I spent hours on Pinterest looking for Images of Magical Mushrooms, I settled on these three and place the extra into my “Assundries” Folder on my Pinterest Page.
3.  Adjust them to size so that the three of them can be the backdrop for the GSLC Art Nouveau Frames.
4.  Prepare Elongated Wooden Frame spraying with Seth Apter Izink Dye Sprays in Tea, Spring Green, and Honey, TH Distress Spray Stain Carved Pumpkin.
5.  While still wet sprinkle with Nutmeg and Chili Powder. Allow to dry fully.
6.  Once dry, seal entire frame with Matte Medium.
7.  Add patina and interest by dry brushing on Golden Green Gold Acrylic Paint.
8.  Once dry, cut and glue down three magical mushroom images.
9.  Press Images down using a piece of Deli Paper.
10.                Press into place with a weighted Ziploc bag, I fill mine with unused kitty litter.
11.                Prepare GSLC Art Nouveau Frames using Embossing Ink with a roller applicator.
12.                Sprinkle with Allure Ammo Camo and then Allure Weather Wood Embossing Powders, Curing Each time with a Heating Tool.
13.                To fill in any gaps I added TH Distress Stain of Bundled Sage.
14.                Then I did a quick dry brush technique using Golden Van Dye Brown Hue Acrylic Paint.
15.                Prepare GSLC Fairies using Embossing Ink with a roller applicator.
16.                Then sprinkle with Allure Mercury Rising Embossing Powders and Curing with a Heating Tool.
17.                Assemble your piece using Weldbond to adhere the GSLC Nouveau Frames and Fairies to the Magical Mushroom Prints.
18.                Hold into place with a weighted Ziploc bag as described above.
19.                Once fully dry, seal everything using a paintbrush and Matte Medium.

Some Final Thoughts.
 
Cicely Mary Barker’s Flower Fairies have fascinated me since I first found them on Pinterest many years ago. They were first published in 1923. The drawings portray Botanically Accurate Flora and Fauna along with enchanting fairy images based on real children from Cicely’s sister’s nursery school. Visit This Site to view The Fairies of The Autumn Archives. If you click on each image it shows you the accompanied poem or verse dedicated to the individual Flower Fairy.